Paint Decontamination: Pro Tips
SFP
Reading time: 7 minutes
Paint decontamination is the process professionals use to safely eliminate these embedded particles and restore a smooth, glasslike finish. It is also an essential preparation step before polishing or applying a sealant, wax or ceramic coating. A clean surface ensures better results, longer lasting protection and a noticeably higher gloss.
This guide breaks down the full decontamination process, the different types of chemical removers, and the mechanical methods detailers use to bring paint back to a contaminant-free state.
Bonded contamination affects paint in several ways:
A routine wash removes loose dirt. Decontamination removes what is left behind.
Bonded contamination comes from environmental fallout, brake dust, industrial particles, tree sap mist, tar spray, road film, hard water minerals and overspray. These microscopic pollutants bond to the clear coat and do not wash off with soap and water.
Your car may need decontamination if you notice:
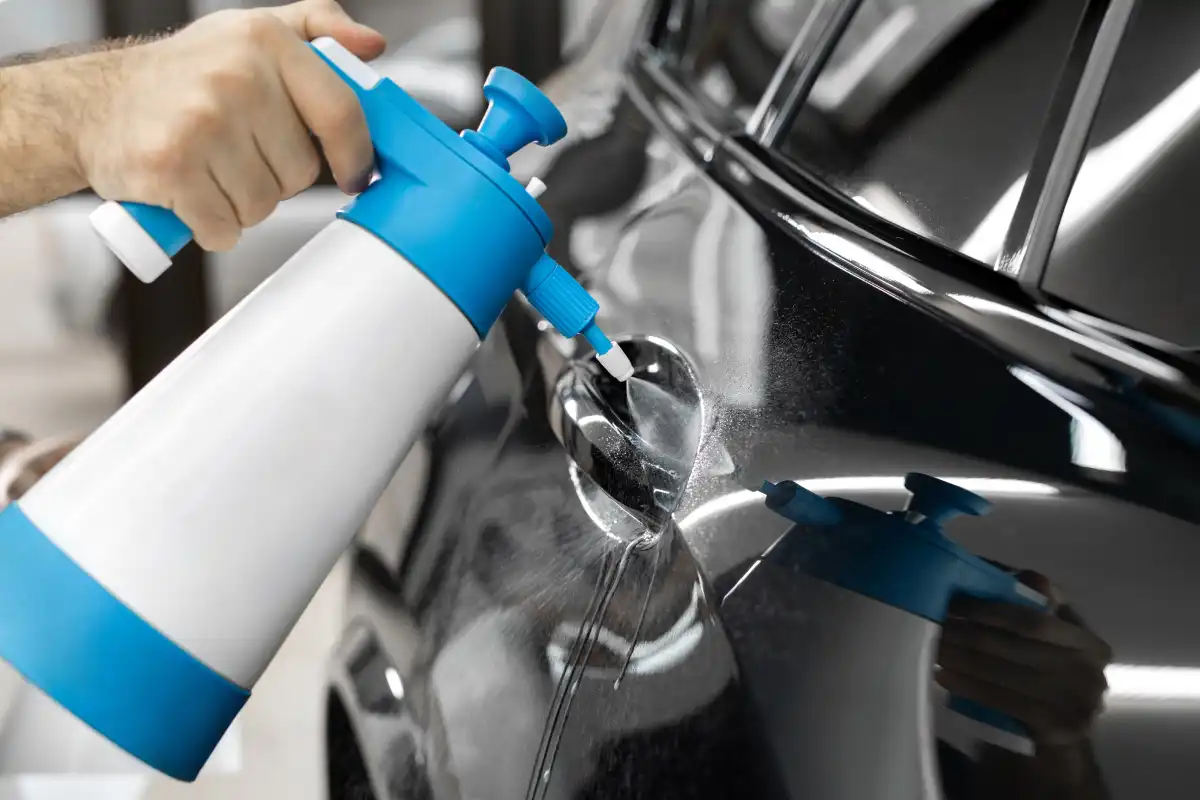
Chemical decontamination targets specific types of bonded contamination using products formulated to break them down. Each category of remover addresses a different type of residue. Professionals typically work in this order: tar remover, iron remover, water spot remover and then mechanical decontamination if needed.
Always read manufacturer instructions and check product compatibility with the surfaces you are working on.
Tar removers dissolve non-polar, organic contaminants. Examples include tar spots, road construction residue, tree sap, adhesives and similar sticky deposits. They are strong solvents, so it is important to verify that the product is safe for the paint, plastic trim and any protective film.
Professional usage typically involves:
Tar removers are not always safe on unpainted plastic, rubber or fresh paint. Always check the label and perform a small test spot.
Iron fallout is one of the most common sources of bonded contamination. It comes from brake dust, rail dust and industrial pollutants that embed themselves into the clear coat. Iron removers dissolve these particles on contact. Many turn purple as they react, which helps indicate where contamination is concentrated.
Key guidelines include:
If certain particles remain after multiple rounds, they can usually be removed in the mechanical stage.
Mineral deposits from hard water can leave visible or invisible spotting on paint, glass and trim. Water spot removers are acidic products designed to break down these mineral residues before polishing or applying protection.
Important considerations:
This step is essential before applying coatings or sealants because mineral films can prevent proper bonding.
Below is a general overview of how different decontamination chemicals interact with common automotive surfaces. Always check manufacturer documentation because formulas vary.
| Surface | Tar Remover | Iron Remover | Water Spot Remover |
|---|---|---|---|
| Rubber | Often unsafe | Often unsafe | Often unsafe |
| Plastic | Varies | Safe on most products | Safe on most products |
| Glass | Usually safe | Safe | Varies by product |
| Paint protection film | Avoid unless specified | Safe on most products | Safe on most products |
| Clear coat (gloss) | Safe with most products | Safe | Safe |
| Matte paint | Varies | Safe | Varies |
| Fresh paint | Often unsafe | Varies | Varies |
| Single stage paint | Safe | Safe | Safe |
Once chemical decontamination removes the majority of bonded contaminants, the remaining particles are addressed mechanically. Mechanical decontamination uses a clay bar, clay towel or clay mitt to shear off particles that protrude from the surface.
Clay bars have been used by detailers for decades. Modern alternatives include synthetic clay pads and towels that attach to a hand strap or machine backing plate. These tools:
| Tool | Aggressiveness | Ease of Use | Reusability | Best For |
|---|---|---|---|---|
| Clay Bar | Mild to moderate | Moderate | Low | Precision work or spot treatment |
| Clay Mitt | Moderate | Easy | High | Large panels, faster full-vehicle decon |
| Clay Towel | Mild | Easy | High | Maintenance decontamination and quick jobs |
Proper lubrication is essential. Insufficient lubrication can introduce marring. Most detailers use either a dedicated clay lubricant or a diluted rinseless wash solution.
Professional technique includes:
If the clay grabs strongly at the start, it usually indicates contamination. When it begins to glide freely, the section is clean.
Synthetic clay tools must be rinsed frequently to prevent particles from embedding into the surface of the pad.
For a deeper look into paint correction techniques, check out How to Do Paint Correction.
Here is a simplified workflow used by many professional detailers:
Following this order prevents surface reactions between chemicals and reduces the risk of marring during claying.
Avoiding these mistakes helps maintain clear coat integrity and ensures a flawless finish.
Light contamination: every 6 to 12 months
Heavy contamination areas: every 3 to 6 months
Before any polishing
Before applying a coating or sealant
For safe use of chemicals:
After decontamination:
Paint decontamination is one of the most effective ways to restore smoothness, clarity and gloss to automotive paint. When performed correctly, it prevents long-term clear coat damage and creates the ideal foundation for polishing and protection. Whether preparing for a wax or a ceramic coating, a clean and contaminant-free surface is the key to achieving professional results.
For related guidance on preventing surface defects that often require deep decontamination, check the pillar article Car Surface Damage: Complete Guide.
Decontamination usually follows four stages: cleaning, disinfection, sterilization, and storage. Some procedures instead use deactivation, decontamination, cleaning, and disinfection.
Driving in polluted areas can lead to heavier fallout, which increases the need for decontamination. After a normal wash, when the car is completely clean, glide your clean hand over several panels. If the surface doesn’t feel smooth, it is likely time for a decontamination.
Yes, oxidation can be corrected either by chemically reducing it or by removing the oxidized layer through abrasion or polishing.